

“No way! You sew? Such a coincidence, my great aunt gave me a whole bag of awesome fabrics, I’m sure you’ll love them!”
If your friends know you sew, you’ve inevitably been in this situation! And if, like me, it’s hard for you to say no to fabric, you definitely have a few yards of fabric in your stash that you have no intention to show off!
Furthermore, you’re a seamstress, so yes, you have a ton of tiny to small scraps, that your green side is keeping you from throwing away.
If such is the case, this project was made for you! It’ll allow you to use up a few yards of yukky fabric, recycle a huge chunk of scraps too small to be sewn and create a unique bean bag chair for you or your little one! So let’s jump right in!
Bean bag structure and dimensions
The bean bag chair I’m offering here is made of 4 independent cushions (seat, 2 armrests, backrest), all of which will be stuffed with your scraps. These elements will be inserted in a cover, which will allow you to easily wash the bean bag. The cover will have dividers inside, in order to maintain each cushion in its right spot.

Cushions

Cover

Dividers
I’ve included 4 sizes in this tutorial, whose dimensions are given in following table:

Dimensions of bean bag armchair in centimeters - For dimensions in inches, divide these values by 2.54.
The Small size is suitable for a small child, up to about 3 or 4 years old. The Medium size will be for an older child. The Large size will be suitable for a teenager or a small adult. The Extra Large size will go for a tall or wider adult.
What you will need
To sew this bean bag chair, you’ll need:
- a pretty main fabric, non-stretchy and thick enough to make the cover; an upholstery fabric seems like the perfect choice but many others will do,
- a secondary fabric, non-stretchy as well, ugly or pretty, to sew the inside elements (seat, armrests, backrest) that will remain totally invisible. I’ll call this one "cushion fabric " from now on,
- a fabric for dividers, non-stretchy, which will also remain invisible,
- A WHOLE LOT of scraps for padding of the cushions: the softer your scraps, the more comfortable the cushions will be. Indeed, if you sew a lot of jersey, fleece and sweatshirt fabric, you will have very soft scraps that will result in a more comfortable padding. But, if you only sew oilcloth, no one in their right mind will want to sit on your bean bag.
- 11 to 20 buttons or snaps to close the cover, depending on the chosen size chosen,
- As an option, garnish the chair with corded piping, along the top edge. This piping can be store bought or homemade (I tell you how to do that further down the page).
The quantities of each supply are given in the table below:

Yardage given in centimeters - For yardage in inches, divide values by 2.54.
It’s impossible to estimate the weight of scraps needed to stuff the different elements of the chair, which is why I indicated the volume in cubic meters. For volume in liters, multiply the figure in m3 by 1000! When I told you that this project would use up a LOT of scraps, I wasn’t kidding! In any case, the chair will be quite heavy, regardless of the size you pick and nature of scraps.
Homemade corded piping
If you want to make your own piping, cut a strip of main fabric (or matching fabric) 4cm (1 ½’’) wide and the length of desired piping. If necessary, connect several strips of fabric together. Place cord on wrong side (WS) of strip in the center. Fold the strip in half, with WS together, encasing the cord and pin. Sew with a straight stitch along the cord. Your corded piping is ready to use.
Cutting the fabrics
If you’re lucky enough to have a projector installation in your sewing space, you can download the projection format of the bean bag pattern here. This file is ready to use and includes 1cm (3/8’’) seam allowances.
Otherwise, the shapes of pieces are quite basic, so refer to the information below to draw each piece directly on your fabrics.
The dimensions are given excluding seam allowances. So be sure to add 1 cm (3/8’’) of seam allowance all around your pieces after drawing them!!
Grainline goes from top to bottom on these diagrams. Be sure to respect it and draw your pieces in the right direction, especially if your fabric print is oriented.
There are many pieces, so be sure to mark each piece with its number after cutting it, using a post-it note or sticker.
The value of a differs depending on the size you wish to sew:

Value of a in centimeters - For value in inches, divide by 2.54.

Cut:
- once in main fabric
- 8 times in cushion fabric,
- 3 times in divider fabric,
Use for:
- Cover: front of seat (x1)
- Seat cushion: sides, front and back (x4)
- Armrest cushions: inner side and bottom (x4)
- Dividers (x3) between armrests and seat

Cut:
- 3 times in main fabric,
- 4 times in cushion fabric,
Use for:
- Cover: seat (x1)
- Cover: Outer sides (at armrests) (x2)
- Seat cushion: top and bottom (x2),
- Armrest cushions: outer side (x2)

Cut:
- twice in main fabric,
- 4 times in cushion fabric,
- twice in divider fabric,
Use for:
- Cover: front of armrests (x2)
- Armrest cushions: front and back (x4)
- Dividers between armrests and backrest (x2)

Cut:
- twice in main fabric,
- twice in cushion fabric,
Use for:
- Armrest cushions: top (x2)
- Cover: top or armrests (x2)

Cut:
- twice in main fabric,
- twice in cushion fabric,
Use for:
- Backrest cushion: sides (x2)
- Cover: sides of backrest (x2)

Cut:
- 3 times in cushion fabric,
Use for:
- Backrest cushion: front, back and bottom (x3)

Cut:
- twice in cushion fabric,
Use for:
- Backrest cushion: top (x2)

Cut:
- once in main fabric
Use for:
- Cover: bottom flap (x1)

Cut:
- once in main fabric, on fold,
Use for:
- Cover: front of backrest (x1)

Cut:
- once in main fabric
Use for:
- Cover: back of backrest (x1)

Cut:
- 4 times in main fabric,
Use for:
- Cover: side facings for bottom finishing (x4)

Cut:
- twice in main fabric,
Use for:
- Cover: back facing for bottom finishing (x2)
Assembly of cushions
The four cushions are entirely sewn with secondary (or cushion) fabric. Thus, in the following paragraphs, when I refer to a piece by its number, it will always be the piece(s) cut in secondary fabric.
To ensure that the cushions fit in the cover, I advise you to sew these cushions with a seam allowance of 1.5cm (1/2’’) (even if you have only added 1cm of allowance to the pieces). The cover will then be sewn with the same shapes and sizes of pieces with a 1cm (3/8’’) seam allowance, which will ensure the cushions insert easily into the cover.
In the following diagrams, pieces to be sewn are shown in blue, while pieces already sewn are green.
Seat cushion

With right sides (RS) together, pin, then sew the four pieces No. 1 two by two, by the short edges, to form the sides of the seat cushion (this forms a square). Finish the raw edge with a zigzag stitch if the fabric tends to fray.

With RS together, pin the square thus formed on a piece No. 2, aligning side seams with corners of piece No. 2. Sew with a straight stitch along all four sides. Finish edge.

With RS together, pin another piece No. 2 facing the first one, aligning side seams with corners of piece No. 2. Sew with a straight stitch, leaving a 10 to 20 cm (4 to 8’’) opening on the last side.
Turn cushion to RS. Stuff it with fabric scraps.
Close the whole by hand using a ladder stitch. If you are not sure how to do that, here is a great tutorial: How to sew the PERFECT Ladder Stitch | Invisible Stitch | Hidden Stitch by hand. A Beginner's Guide - Mindy Makes
Armrest cushions
The following operations will have to be performed twice, for both armrests.

With RS together, pin two pieces No. 1 by aligning the longest edges. Sew and finish edges.

With RS together, on long edge of one of these pieces, pin a piece No. 2. Sew and finish edges.

With RS together, pin a piece No. 3 at the front of the assembly thus formed, and another piece No. 3 at the back. Align corners of pieces No. 3 with seams. Sew and finish edges.

With RS together, pin a piece No. 4, which will be the last face of the armrest. Align corners of piece No. 4 with seams. Sew and finish edges all around, leaving a 10 to 20 cm (4 to 8’’) opening on the fourth side.
Turn armrest to RS. Stuff with fabric scraps. Close the opening by hand with a ladder stitch.
Repeat these operations for the second armrest cushion.
Backrest cushion

With RS together, pin the three pieces No. 6 along their longest edge. Sew and finish edges.

With RS together, on each remaining long edge of these pieces, pin a piece No. 7. Sew and finish edges. Then pin, sew long edges of both pieces No. 7 together, to create the top edge of the backrest. Finish edges.

At each end of the "tube" thus formed, pin a piece No. 5, with RS together. Sew and finish edges all around piece No. 5 at one end. On other end, sew and finish edges, leaving a 10 to 20 cm (4 to 8’’) opening on the upper edge.
Turn cushion to RS. Stuff with fabric scraps. Close the hole by hand with a ladder stitch.
Assembly of the cover
As a reminder, the seam allowances of the cover are 1cm (3/8’’).
For each assembly, pay attention to the orientation of your fabric’s print if necessary, because this fabric will be the one that is visible! 3D diagrams will help you visualize assemblies as you go.
Assembly of the periphery
In this paragraph, regardless of the part numbers used, they will always refer to the parts cut from the main fabric.

With RS together, pin piece No.1 with two pieces No.3. Sew and finish edges. This is the front of the chair cover.

Assemble a piece No.2 with a piece No.5. This is one side of the chair cover. Assemble this side to the front part, pinning piece No. 2 to the highest edge of a piece No. 3 from front. Sew and finish edges. Repeat on other side of cover.

Finish the periphery of the cover by assembling part No. 10 between the two pieces No. 5.

Optional : on RS, pin the corded piping all around upper edge, aligning raw edges.
Start at one side, to make the piping connection as discreet as possible.
Sew 0.5cm (1/8’’) from raw edge with a long stitch to hold the piping in place.
Assembly of cover seat
We will now create the upper part of the cover, assembling the seat with the top of the armrests and the front of the backrest. But we will also integrate the inner dividers of the cover with these same seams.
We will therefore handle parts of the main fabric (MF) and parts of the dividers fabric (DF).

With RS together, pin the remaining piece No.2 (MF) to the long edge of a piece No.4 (MF). Then, align long edge of a piece No. 1 of divider fabric and pin (you can pin it to piece No. 2 or piece No. 4, RS or WS together, it doesn’t matter). Sew with a straight stitch through the 3 layers of fabric and finish edges. Repeat this operation on the other side of piece No.2 (MF).

With RS together, pin piece No.9 (MF) along first piece No. 4 (MF), piece No.2 (MF), and other piece No.4 (MF), aligning corners of piece No.9 with seams.
Then align pieces No.3 of divider fabric with junctions of pieces No.9 and 4, and the last piece No. 1 of divider fabric with junction of pieces No. 9 and 2.
Sew with a straight stitch through all 3 layers of fabric. Finish edges. It will be easier to sew the 3 sections of this seam separately.

Then assemble the divider fabrics three by three to create the compartments for the cushions. It will be difficult to sew them all the way to the top; It does not matter, stop the seam 2 or 3 cm before getting to the top corner.
Assembly of seat with periphery

With RS together, pin the entire upper part of the cover on the periphery (sandwiching the piping between the two if you have chosen this option). Sew with a straight stitch all around.
If you have chosen to sew a corded piping, use a zipper presser foot and offset your needle, in order to stitch as close as possible to the cord of the piping.
Seams and corners of seat must align with seams of periphery.

Without turning to RS (diagram is only for understanding), pin the vertical raw edges of the dividers to the seam allowances of the periphery of the cover and sew to close the cushion compartments. Start the seams 2 to 3cm higher than the bottom of the cover and stop them 2 to 3cm before getting to the top corner (you will have trouble stitching to the top, given the configuration of the parts).
Finishing the cover

Assemble 2 pieces No.11 to a piece No.12, with RS together, at the oblique edges.
Repeat a second time, to make two facings:
- the first will be installed on the bottom flap of the cover,
- the second will be installed at the bottom of the periphery of the cover).
Finish inside edges of both facing with a zigzag stitch.

With RS together, pin one facing on the perimeter of piece No. 8. Sew and finish edges. Strip the corners (cut seam allowance at an angle at the corners) and turn facing to RS. Push corners out with a pointy but not too sharp object (I have a chopstick in my sewing box!) to obtain neat corners. Press. This constitutes the bottom flap of the cover.
If you chose to use snaps, you can either install them now, or once the facings are assembled to the cover. If you are sewing in buttons and buttonholes, it will be easier to do it now.

Stack both facings and mark positions of the buttons: start by positioning 2 buttons in the corners, on the seams at an angle at the junction of the pieces, then distribute the other buttons evenly, centering them in width on the facing.
n varies according to size: Small: 3, Medium: 4, Large: 5, Extra Large: 6.
Sew buttons to RS the facing attached to the flap (sew through both layers) and sew the buttonholes on RS of the other facing.

With RS together, pin raw edge of flap along front bottom of cover. Sew and finish edges (including width of facing on each side).

With RS together, on the three remaining bottom raw edges of cover, pin the second facing (with buttonholes) around the periphery. Also pin the short edges of facing to front of cover (sandwiching the flap). Sew and finish edges.
If you haven't installed the snaps yet, now is the time to do it, referring to instructions above for placement.
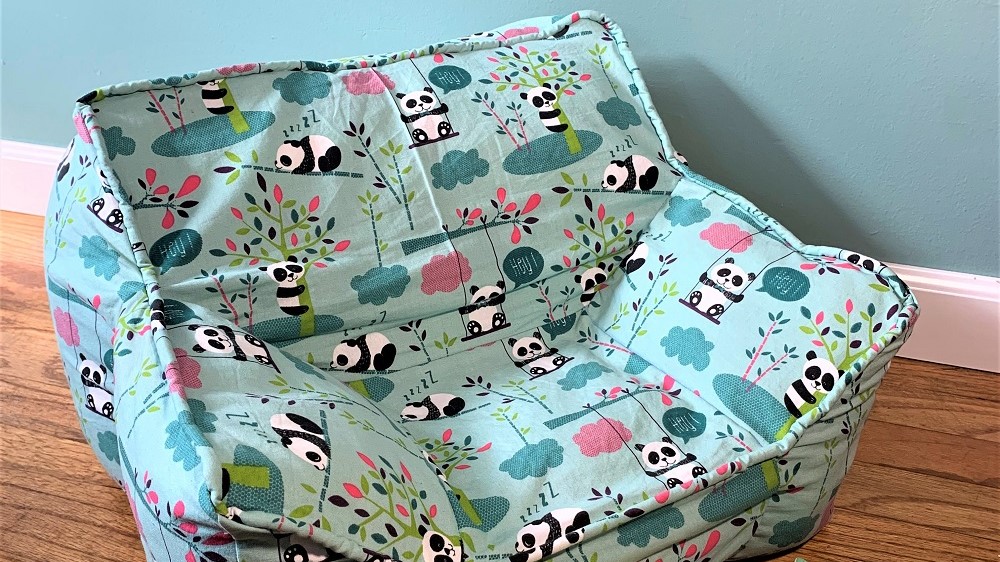
All that’s left to do now is insert the cushions in each compartment, find a good spot for your new chair and try it out: you have earned a break!!
Tell me what you think of your new bean bag chair, why you love it or if you've encountered any difficulties! I’d love to hear from you!


